The nail breaks on the side. What to do if your nail is broken
From this article you will learn:
- What are the main causes of brittle nails?
- What to do if a nail breaks under gel polish, a nail extended with acrylic, or a natural nail
- What to do if a nail breaks in the center, on the side, at the root
- How to repair a broken nail yourself using a tea bag and special glue
- How to temporarily restore a broken nail before visiting a specialist
- What are salon methods for restoring a broken nail?
- What are the main measures to prevent brittle nails?
Neat nails of suitable length are a real decoration for women’s hands. Therefore, a beautiful manicure is rightfully considered one of the main components of an impeccable image. But none of us is immune from possible troubles, and the strongest nails can also “let down” the hostess by breaking right before an important event. However, there is no need to be upset in advance, because the problem can be easily fixed. In the article we will tell you what to do if your nail is broken, and we will also understand what can provoke such situations and how to prevent them.
The main causes of brittle nails

If you always want to have beautiful and strong nails, it is important to know what can cause nail plates to become brittle and weakened.
Most often, nails begin to break for the following reasons:
1. Lack of vitamins, trace elements and minerals designed to maintain health and beauty. A sufficient amount of these substances in the body is synonymous with healthy and strong nails.

Therefore, the first thing to do if your nails break quite often is to reconsider your diet.
Foods rich in vitamins and microelements for healthy nails:
seafood;
milk and other dairy products;
nuts and sesame;
seaweed;
zucchini, cucumbers;
fatty fish;
vegetable juices;
basil, parsley, cilantro and other greens;
pumpkin seeds.
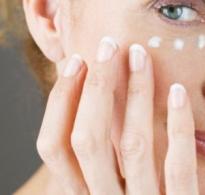
2. Improper care. Most of the cosmetics that we use to take care of our hands and nails every day contain acetone and formaldehyde. Due to contact with these substances, natural nail plates weaken, lose their natural hardness, and become brittle. Detergents and poor quality water cause no less harm to them.
Taking good care is the second thing that is important to do if your nails begin to break. There are a huge number of wellness procedures, most of which you can do yourself. For example: baths with oils, masks, special varnishes to strengthen the plates, various folk methods.
All of the above helps improve the condition of the nail plates. However, it is equally important to know what to do if the nail has already broken. We'll talk about this later.
What to do if your nail is broken, and what not to do
The mechanism of the procedure for breaking a nail will depend on how severely the nail plate was injured. First, let's list the most common types of damage:
Lateral detachments without injury to the bed;
Breakage of the nail plate at the very “root”;
Cracks with damage to the bed;
Injury with a detachment of the plate and damage to the skin under the nail.
The last option is the most unpleasant and painful.
A broken nail brings a lot of problems to girls: an unaesthetic appearance of their hands, snags on their favorite clothes, scratches on the skin. “First aid” will depend on how badly the nail was damaged.
Actions to take as soon as a nail breaks:
cut or file a plate;
glue the broken part of the nail;
resort to the services of a manicurist.
What to do at home if your nail is broken, but you want to keep your manicure? The damaged area can be glued together. The technology of this process will depend on where the nail plate was broken: in the overhanging part of the nail or in its center. Additionally, the size of the fracture is taken into account.
A small crack can be sealed with a patch made of natural fabric or a paper plaster. This method will work if the fracture occurs on the side of the plate, along the “smile” itself or along it.
If the free edge of the nail is completely broken, then a tip (a special acrylic product) is applied on top.
The tip is also used if the nail is broken along the axis of the finger.
You can solve the problem for a long time only if your nail is broken no more than 1/3 of the entire free edge.
When asked what to do if your nail is very broken, we recommend turning to the services of a manicurist. A deep break with damaged skin under the nail is very difficult to fix on your own.

What not to do if your nail is broken:
Squeeze glue onto natural surfaces not protected by varnish.
Apply your natural nail to glue. Aggressive chemicals corrode the natural plate. This method can only be used in case of extended nails.
If the nail is broken “to the meat”, you cannot wet it in acetone or other compounds. Aggressive substances will cause severe irritation and inflammation of the open wound.
There is no need to put off restoring the plate. Usually cracks grow quite quickly, and the broken part can come off completely. Then it will be more difficult to correct the situation.
What tools are needed to repair a broken nail?
Restorative procedures should be started as early as possible, as the fracture may increase. Necessary equipment:
Disinfectant. It is better to use something whose action is aimed not only at degreasing the plate and removing contaminants, but also at eliminating excess moisture. At the same time, the nail should not dry out.
Special fabrics. To restore the plate, you can purchase natural fabric (silk, linen) or artificial fabric (fiberglass). The most convenient options are silk and fiberglass. They are sold in strips or individual samples according to nail sizes.
Special nail glue, whose composition should be safe for nail plates. This restoration adhesive is quick-drying.
Nail files and buffs. The tool you will use to repair a broken nail must have an abrasiveness of at least 240 grit. Buff is a special polishing file. If you use a cloth, a buff will be very convenient for smoothing the surface of the nail plate.
To perform high-quality restoration procedures, we advise you to purchase a set with all the described devices. This way you will save your time and finances.
What to do if your nail breaks under gel polish
The first thing to do if a nail under gel polish breaks is to remove the coating. It is enough to remove the varnish only from the broken plate. Depending on the type of coating you have, use shellac or biogel remover. If you can't get rid of the old varnish, you can make a patch over it.
The patch is applied to the gel polish in the same way as to a natural plate. Next, the sealed area is covered with a new layer of varnish and dried in a UV lamp.

If the nail is broken along the edge, then the broken part can be cut off and extended with biogel. Take a piece of foil and place it under your nail. It will serve as a “support” for the gel polish. Dry the nail in a UV lamp and carefully remove the foil.
What to do if a nail extended with acrylic breaks?
Restoration should be done with acrylic tips. These are artificial devices, so the use of synthetic glue (“Moment”) will be harmless. You can use filter paper, silk strips or paper plaster as fastening patches.
What to do if a nail extended with acrylic breaks:
If the damage is too severe, you can re-grow the nail.
Apply glue to the plate and attach a paper strip.
Apply a second layer of glue, and after it dries, apply a third.
The next step is polishing the plate with a nail file.
Apply new varnish.

A simpler option is to replace the damaged acrylic tip with a new one.
What to do if your natural nail breaks
Usually a fracture of the nail plate forms directly along the “smile”. Restoration will preserve your manicure, but the nail will lose strength.

What to do if your natural nail breaks:
Remove the varnish and wipe the plate with an antiseptic.
Polish the bumps on the surface of the nail with a special buff file.
Make a patch. The piece of fabric should be 2-3 mm larger than the break (from each edge).
Lubricate the coating with glue and place the fabric. To evenly distribute the patch, you can use the sharp tip of a toothpick.
After the glue has dried, treat the nail with a polishing buff file.
Depending on the degree of damage, apply another 1-2 layers of fabric.
The final stage is coating the plate with varnish.
If your nail is broken, you need to choose the right way to solve the problem.
What to do if your nail is broken in the center
In this case, you will need a tip. Blank products must be square and transparent in color.
What to do if your nail breaks in the middle:
Use a polishing file to smooth out any uneven edges of the nail.
Wipe your nail with nail polish remover.
Cover its surface with special glue, and do the same with the inside of the tip.
Place the tip on your nail so that the edges of the product and the nail match.
Wait until the glue dries completely.
Adjust the shape of the tips to match the look of the rest of your nails, leaving a small margin.
Shape the nail, align the plate (it should coincide with the edge of the tip). Seal the joint.
What to do if your nail breaks on the side

Now let's figure out what to do if the nail breaks on the side:
As in previous cases, you first need to wipe the nail with a disinfectant solution. Then polish the crack until you have a smooth surface.
Prepare a fabric patch.
You need to make two stripes. The first piece should be slightly larger than the break; this will be the first layer. The second one should match the width of the nail; it is used as a second layer.
Now let's move on to the restorative procedure that needs to be done if the nail is broken. To fix the fabric on the plate, it is pre-lubricated with glue. You can straighten the material with the sharp tip of a toothpick. The fixed strip of fabric is covered with glue. After it dries, carefully polish the surface.
The same needs to be done with the fabric that we prepared for the second layer. After this procedure, treat the nail with a buff. Restored, it will retain its appearance until the plate grows up.
What to do if the nail is broken at the root
The most unpleasant situation for lovers of flawless nails is a severe fracture of the nail plate. Let's look at what to do if the nail breaks at the root. The first step is to thoroughly blot it in a disinfectant. Hydrogen peroxide, chlorhexidine, miramistin, etc. are suitable. Such a nail is very difficult to restore. Therefore, we advise you to contact a manicurist.

The procedure can be done only after the wound on the skin under the nail has healed.
In salons, this manipulation is done using special biogels. These coatings contain proteins that restore the nail plate. Biogels also protect cracked nails from infection.
Many biogels dissolve when interacting with detergents and acetone. To keep your manicure intact, it is better to wear rubber gloves when washing dishes or cleaning.
How to restore a nail plate after a broken nail at the root
Remove the broken nail.
The first thing to do if the nail is broken at the root is to completely remove the broken part of the plate. This is necessary to heal a wound on the skin. It is more convenient to cut off the broken edge with nail scissors. If you need to lift the broken part, use tweezers.
After removing the broken nail, it will become more convenient to treat damaged skin. This will avoid infection and further inflammation. The remaining part of the broken nail can be left, but in this case the treatment will be more difficult. The deformed edge will separate as the plate grows.
Stop the bleeding.
The next thing to do if the nail breaks at the root and causes the formation of a bleeding wound is to stop the bleeding. Apply a piece of bandage or disc to the wound, press firmly on it, and hold for several minutes.
Trim off the rest of the nail.
If the injury causes very severe pain, then a specialist should restore the nail.
Soak your foot or hand in cold water.
After trimming the broken edge of the nail, soak your finger in cold water for 20 minutes.
Choose a temperature of the liquid that would help to gradually reduce pain. This procedure helps normalize blood flow in the limb.
Soak your hand or foot in salt water.
Now place your hand in a previously prepared bowl of warm salted water (the solution should contain 1 teaspoon of salt and 4 cups of clean water).
Keep your finger in the solution for 20 minutes. Liquid with added salt prevents infection. This procedure should be done 2-3 times a day for the first three days after the injury. Dry your finger with a cotton cloth.
Use antibiotic ointment.
To restore damaged skin faster, gently wipe the wound with antibiotic ointment.
Your hands should be clean throughout the entire procedure.
Apply gauze to the nail bed until the plate grows back.
This must be done so that the nail broken at the root does not cling to things. Gauze will also protect the nail plate from infection.
Repeat the procedure until the plate grows back. The gauze must be changed with each subsequent wound treatment. The damaged area must be dry. If the bandage gets wet, it should be replaced.
Monitor the condition of the wound.
During the first time after injury, care must be taken to ensure that no infection gets into the wound. This is especially true in the first 72 hours after injury.
Signs of infection: fever, inflammation, heat in the wound area, pain, swelling or suppuration.
Monitor the condition of the wound until a new healthy nail grows. If you realize that you have an infection, go to the doctor immediately.
How to repair a broken nail yourself using a tea bag
A tea bag, a nail file, and superglue are all you need when you need to “fix” a broken nail. What can I do to restore my manicure using these items?

Procedure:
Remove the tea from the bag. Cut a small strip out of it in the shape of a rectangle. It should be slightly larger than the break.
Treat the nail with a polishing file until the surface is smooth.
Apply a small layer of superglue to the cut strip. Place it on your nail and apply another layer of glue on top. After this glue has hardened, apply a third layer. The protruding ends of the paper can be trimmed using nail scissors.
Treat the nail with a polisher, remove the glue with acetone or an alcohol solution. Finally, coat your nails with clear polish.
How to repair a broken nail yourself using special glue
A good remedy is a special glue for broken nails. Let's consider what to do if you want to correct the situation with its help.

The first step is to wash your hands thoroughly to remove any greasy residue from creams and oils. Dry your fingers well with a towel.
Preheat the water in advance. Dip the broken nail into it. This must be done so that the plate does not harden. If the nail is only cracked without coming off completely, then this procedure can be skipped.
Apply a small amount of glue to your nail. It is convenient to distribute it over the plate using a toothpick or the sharp tip of an orange stick.
In manicure supply stores you can purchase special glue for restoring damaged plates. But if you cannot do this at the moment, you can use regular superglue. Try to do everything carefully so that the product does not get on your skin.
Now let's proceed to the main procedure that needs to be done if the nail is broken. To fix the deformed area on the plate, apply it and hold it there for one minute. This will be enough to ensure that the nail plate is well secured.
Next, remove excess layers of glue with a cotton pad soaked in nail polish remover. This must be done as soon as possible so that the glue does not have time to dry. This is necessary so that unnecessary irregularities do not form on the plate.
Once the glue is completely dry, polish the plate with a fine-grit polishing file. You should get a flat, smooth surface. An important rule when working with a nail file: guide the tool in one direction only. This will avoid even more damage to the nail plate.
At the end of the procedure, apply a protective coating (varnish) to the nail. Now wait until the composition dries. The restoration is complete!
The first thing to do if you have a broken nail is to assess the extent of the damage. If it is insignificant, then you can carry out the restorative procedure yourself. However, if you are faced with an extensive injury that is accompanied by severe pain or even bleeding, then it is better to go to a specialist.
Many girls get their manicures done by the same master, who has proven his professionalism with quality work. But if you have a broken nail and require immediate intervention from a specialist, you will probably have to wait, since the influx of visitors is usually very large.
A method of temporarily restoring a broken nail before visiting a specialist

You will need a narrow roll of tape. Cut a small strip, it should be slightly larger than your nail. This can be done carefully using nail scissors or regular scissors. If you only have large scissors on hand, use the ends.
For the procedure you need to take single-sided tape. Transparent adhesive tape for gift paper, multifunctional adhesive or any other type, but always transparent, will also work. Make sure that its adhesive power is not too strong. In our case, it is worth excluding electrical tape.
Now let's proceed to the main procedure that needs to be done if the nail is broken. To restore the damaged area, stick the prepared piece of tape onto the nail plate. You need to try to make sure that the middle of the gluing surface is above the break itself.
Press on the damaged area and hold it there for a while. Carefully place the tape on both sides of the plate; it should completely cover the nail.
Before covering the nail plate with tape, you need to check that its broken halves meet.
Press down on the taped area to better secure the tape.
To avoid causing even greater damage, straighten the tape in the direction of the crack.
Cut off any excess tape. This is convenient to do with nail scissors. If the tool is not at hand, use the ends of large scissors.
The edge of the tape should be very tightly attached to the nail.
The described method is exactly what you need to do if your nail is broken and a trip to the nail technician is not coming soon. A specialist will eliminate the problem using more effective methods.
Salon methods for restoring a broken nail
If your nail is broken, it is better to contact a specialist. Almost any nail salon provides nail restoration services.
- Sealing.

Sealing with wax is usually done in the following sequence:
plate design;
grinding;
removal of contaminants;
waxing the nail;
lubricating the plate with nutritious oils.
Important! Varnishing should be done no earlier than 20 minutes after the procedure. Afterwards you need to wash your hands well.
Sealing is a restorative procedure. If your nail is broken, we recommend having it done to improve the condition of the nail plate.
This process is also useful for treating nails after extensions; in addition, it helps to “revive” the plate after contact with household chemicals.
The effect of the procedure lasts for several days. Re-sealing can be done after the film is completely erased.
- Reinforcement with fabric or paper.

This procedure is usually used to fix a nail that has already broken. But we will consider its use to strengthen the nail plate.
Procedure:
polish the nail;
apply glue or clear varnish to it;
stick a piece of fabric;
bend it under the plate;
apply a fixative;
Keep the “structure” for 3-4 days, you can apply varnish on top of it.
If you want to reinforce it with paper, then you should not apply varnish. This manicure will not look attractive. In this case, the varnish takes a very long time to dry.
Instead of a conclusion: basic measures to prevent brittle nails
What to do to prevent your nails from breaking? If you often encounter this problem, we advise you to pay attention to the prevention of brittle nail plates.
The following rules must be observed:
Contact a specialist on time without delaying the problem.
It is important to take proper care: make high-quality coatings, baths, use strengthening oils, and cuticle moisturizers.
Drink enough water. Dehydration of the body provokes brittleness and splitting of nails.
It is better to do cleaning with gloves to prevent nails from coming into contact with harmful chemicals.
Protect your nails from mechanical stress.
Your nail polish remover should not contain acetone.
It is worth doing nail treatment by following these recommendations: hold the file at a right angle, do not tear it off, but carefully cut off the burrs, purchase glass or ceramic tools.
Before your next manicure, you need to give your nails a rest.
Sleep mode (at least 8 hours) and nutrition. Eat more foods containing vitamins A, E, D, as well as calcium, phosphorus and other important elements.
What else should you do if your nails often break? We advise you to pay attention to those methods that can be used at home. Here you don't need expensive cosmetic formulations. Can be used:
sea salt. Surely you have noticed that after a trip to the sea, your nails become stronger and take on a healthy appearance? Indeed, sea salt has a strong strengthening effect on the nail plates. It can be bought at a pharmacy.

Iodine. To strengthen the nail plates, apply it with a regular cotton swab. Then lubricate your nails with cream. A varnish coating can be applied over the iodine.

Healing wax. Eliminates dry nails, which sometimes causes brittleness, so this procedure is very useful. Regular paraffin will not work here.

Clay. Clay wraps nourish marigolds well. After wrapping, apply moisturizer to your nails.

Essential oils. The greatest effect is achieved after procedures with coniferous and citrus fruits. Many oils have an antibacterial effect.

Where to buy high-quality and professional nail files for damaged nails
Among the huge number of online stores offering manicure accessories, we invite you to our “WORLD OF NAILS”! You should choose our services because:
- “MIR FILOK” – own production of nail files.
- "WORLD OF FILES" is the main supplier!
- The showroom of the company "MIR FILOK" is located in Moscow.
- Delivery throughout our vast Motherland!
Why is “WORLD OF FILES” the best option for purchasing a product for you?
- Our store is built on our own production of saws. Thanks to this, you get: minimized cost of service, tested and confirmed product quality, fast production, attractive conditions for distributors.
- Our nail file is made only from materials that have repeatedly proven their quality (South Korea).
- Wide variety of product. Thus, a manicurist with any level of professionalism will be able to satisfy his interests.
- You can figure out which file is right for you. We carry out individual orders.
- Another advantage is the application of your brand logo on the working surface of the files.
Archive
Select month May 2019 April 2019 March 2019 February 2019 January 2019 December 2018 November 2018 October 2018 September 2018 August 2018 July 2018 June 2018 May 2018 April 2018 March 2018 February 2018 Dec November 2017 November 2017It is a rare woman who has not encountered the problem of a broken nail. If it is broken in such a way that it causes inconvenience and pain, or you need to save the same length of the nails, you must urgently seal it.
How and with what materials this can be done - we will analyze in detail.
Choosing an option to help a broken nail
To solve the problem of a broken nail you will need the following materials:
- Disinfectant, or fresh scrub. If the nail has a deep crack and a bleeding wound appears, this area must be treated with a disinfectant. This will remove germs and degrease the plate.
- Buff, nail file. Will be needed for filing and making it smooth.
- Tweezers.
- Materials for plate repair. We will look at them in more detail below.
3.Base coat for gel polish. Performs the same functions as glue. The base is applied to the damaged area and polymerized under a UV lamp.
4. Tips. If the nail is broken in the middle and it is not possible to cut off the damaged plate, extension tips will come to the rescue. The essence of the repair is simple - the tips are glued to the plate so as to fix the damaged area, preventing the nail from cracking further.
5. Clear varnish. Regular varnish can help for a while and stop the breakdown. It's best to combine it with a sticker. First you need to apply a layer of varnish, then glue the sticker and fix it with another layer of varnish.
6.Acrylic or gel. Extension specialists often restore damaged nails, and these two materials are perfect for this. With their help, you can not only fix the crack, but also give the nail the desired shape if it breaks off.
7.Fast setting gel. It is used in salons in extreme cases, when a breakdown has exposed the soft part and bleeding has begun. To prevent the crack from going further, the master fills the crack with a special biogel with proteins that will speed up the healing of the nail. After such repairs, contact with detergents and acetone is excluded, otherwise the gel will quickly lose its properties.
Under no circumstances should you use adhesives such as “Moment” or “Superglue” to repair a nail - they are not intended for contact with the skin and can cause serious harm to health.
VIDEO INSTRUCTION
The most practical method is to cover the nail with a tea bag.
This method seal a cracked nail- the simplest and most accessible, if only because a tea bag can probably be found in every home. It has very tenacious properties, while being translucent and thin.
For repairs you will need the following tools and materials:
- a small piece of tea bag for a patch to seal a crack on the nail,
- clear nail polish,
- nail scissors.
Operating procedure:
- If the nail is covered with varnish, remove it and disinfect the plate.
- We slightly file the surface of the nail at the crack to make it smooth and degrease the nail. Apply a small drop of transparent varnish to the damaged area and apply a piece of the bag. We level it over the surface and apply another layer of varnish.
- If desired, when the transparent varnish is dry, apply a colored coating.
VIDEO DESCRIPTION
- Restoration at home is possible only if the nail is broken no more than 1/3.
- Self-repair will last about 2-3 days. During this time, while the wound is healing and the nail grows a little, try to be more careful.
- If you used clear varnish, do not remove it with an acetone-containing product - just touch it up periodically.
- To speed up the growth of a broken nail, make salt baths daily using 2 tablespoons of sea salt and a glass of hot water.
Typically, plate failure is associated with frequent contact with detergents, as well as a lack of vitamins.
To avoid an unpleasant situation in the future, be sure to use protective gloves when cleaning and washing dishes, review your diet, and also take care of strengthening with caring creams and medicinal varnishes.
Wee-wee-wee-wee! Disperse, comrades, don't crowd, don't see the girl in a semi-fainting state. She needs air. A broken nail is no joke. No, hospitalization will not be required. The situation can be corrected on the spot. This is an ambulance!
So, what to do in an emergency if your nail is broken? How to correct the situation and fix it at home? The professionals speak!
Initial examination
First, the victim must be carefully examined in order to understand the scale of the tragedy. Depending on the location of the injury and the extent of the damage, the treatment method is selected. We need to come to an agreement right away. A case with a complication. For example, if the nail is half broken. If the crack is such that the nail bed is damaged, blood is oozing, the plate has moved away from the “meat,” then under no circumstances should anything be glued. Repairs can only be carried out if the nail itself is damaged, without consequences for the “skin and meat”. There are no photos of such cases here, because the spectacle is not for the faint of heart.
If such a problem occurs, then rinse your finger with hydrogen peroxide and cover it with a band-aid. Next - nails in the hand and cheerfully, cheerfully, to the nearest hospital. Russian maybe, whatever you say, it’s an effective amulet, but it doesn’t happen once in a while. For the girl Tanya, everything healed, but for the girl Dasha, dirt got in and inflammation began. No one is immune from complications. Although the manicure process will be simplified. You will need to paint one less finger. And forever. Doctors are like that, don’t feed me bread, let me cut something off. Okay, a joke of humor, but black. But, unfortunately, it is vital.
Little nothings of life
The simplest situation is if the nail is broken on the side. It cracked, slightly broke, there were no more casualties, the skin was intact and unharmed. It’s unpleasant, it clings to hair and clothes and tends to fall off completely.
There is an exit. “We’ll glue it, gentlemen,” the doctors said. High-quality repairs will extend the life of an injured patient by one to two weeks. Then look at the circumstances. Either trim the overgrown nail or repeat the repair. Providing first aid to the victim: watch, learn, remember!
Preparing for surgery
You will need a certain set of tools:
- disinfectant, degreasing cleaner or alcohol;
- manicure scissors;
- polishing buffer from 240 grit;
- a rough file, 180 grit is quite suitable;
- glue for nail design, tips;
- material for repair.
Now about textile matters. There is a special adhesive-based silk on sale. The price did not go far from the glue. For example, a whole meter of such silk 3 cm wide from RuNail costs 90 rubles. This amount can be used to repair your nails for a year. Or to all the neighbors in the house, at least in the entrance. Or... Well, you understand. This bandage is universal; you can put regular and gel polish, acrylic or gel on top.
If you don’t have silk at hand, and repairs are needed here and now, you can go to the kitchen and look for a tea bag. Shake the tea into a mug and cut a piece of the required size from the bag. A good alternative to silk.
Needlewomen can try using non-woven fabric and any fabrics similar in structure to it. For example, there are medical patches with this texture, on a breathable woven base. A regular rubberized plaster will not work.
Step by step nail repair
Especially for skeptics, the ambulance chose for clarity the option without complications, but with an asterisk. We bet you were sure that if a nail broke at the root and the tip fell off, then there was nothing left to do but cry over the trash can and trim the rest?


Ha! The professionals grin and roll up their sleeves. Everyone loves before and after photos, right? So, here you go.

Everything can be solved, your hands are not for boredom! Detailed instructions with photos will tell you how to seal a nail.
1. Preparation
The nail needs to be treated with a buff, remove the gloss and make the surface of the nail slightly rough. The process is similar to preparing for applying gel polish. By the way, if a nail breaks under gel polish, first remove the old coating, repair it and get a new manicure. If the nail is cracked on the side, file down the jagged edge a little. If you need to glue the fallen off tip, then, on the contrary, there is no need to file the broken edge. Otherwise, the “gears” will not fit together. Finally, thoroughly degrease and disinfect.
2. Main action
Apply glue to the nail:

Attach the broken tail and hold for a few seconds, 15-20, so that the glue “seizes”:

This is what the nail looks like both broken and glued:

Now it's the bandage's turn. If the material is adhesive-based, then the fabric can be immediately applied to the plate. If you use a tea bag or non-woven fabric as a bandage, first spread glue on the plate, then place the fabric.

The piece should not be even; all excess is cut off with scissors and filed with a nail file. Do not skimp on fabric; it is better to cover the entire plate for strength. The larger the area, the lower the pressure. The laws of physics also apply in the nail world.


Apply a layer of glue on top of the bandage, level it and dry:


Armed with a buff, carefully polish the nail. Align the edges of the bandage with the plate. If there are any protruding edges and glue clumps, file them down with a coarse file.

You can apply a control layer of glue to the polished nail and lightly buff it again.

3. Result
Voila! Like new. Now you can paint your nails as usual. Look at the picture:

The nail on the left finger is broken on the side, on the right finger it is broken at the root. Breakdowns are marked with a red line. Nothing is impossible. This technique can be used to repair almost any damage to nails of different shapes and lengths. The proof is in the photo.


Hello!
To my great regret, I managed to break a nail, and not just, but right to the root, plus the layering. There are two ways out of this situation - cut off the rest, which I personally didn’t want, and create a new nail. I chose the second option.
Please take a look.
I’ll say right away that this is the most problematic nail for me - a short nail bed, which results in a very active pad and high side ridges.
This is what my nail looks like before all the manipulations (sorry for the lighting, I took it in the evening) So let's get started. First you need to prepare everything you need:
1. Manicure tools, in my case these are files, pusher, scissors, cuticle remover.
2. Means for degreasing and removing the sticky layer, I have this Severina Cleaner.  3. Forms for extensions, I have the most ordinary noname, 20 pieces cost 40 rubles.
  4. Base for gel manicure. I have this rubber Masura Basic Gel Polish 298-10.
Not every base will do. First of all, it should be thick and viscous. The base from Masura is just like this, it holds a drop well, does not spread, and self-levels.  5. Lamp.
First, you need to perform a regular manicure - treat the cuticle with a remover, file the remaining nails, remove the corners so that they do not interfere in the future, remove the shiny layer from the nail with a buff, and degrease it.
This is what my nail looks like after treatment Then you need to fill in the form. There is a nuance here - all success depends on how correctly the form is set up. When I first started using this method, nothing worked for me. Not the first time, not the second, not the third. The first time I applied too much gel, it ran onto the side rollers. The second time I placed the form crookedly, so my nail turned out to be crooked, the third time I rolled it down. And only for the fourth time, taking into account my mistakes, I was able to grow my nails.
When placing the form, you need to make sure that it is clearly in the center, do not clamp it too tightly at the base of the nail, and make sure that it does not ride up or fall down.
Another important point is that you need to make sure that there is no gap between the free edge of the nail and the form itself, otherwise the gel may flow there. This time I had practically no free edge, I had to push the form, causing myself pain, and still, the gel was a little numb. If the shape does not become straight, it can be cut in the right places, the main thing is that it fits evenly and clearly along the border of the nail.  Then I apply the base gel. You can take some kind of flat brush for this, but I apply everything with my own. First, I put a drop of gel on the border between the natural nail and the substituted form and distribute it along the form and approximately to the middle of the nail, reducing the border to the cuticle to nothing. Then I put another drop, distribute it again, make sure that everything is even at the side rollers and put it in the lamp to dry. This particular rubber base from Masura dries in a 36-watt UV lamp for exactly two minutes.
Then I remove the form, cover the nail again with the thinnest layer of base, all the way to the cuticle, and dry it.  After drying, I remove the dispersion layer and process the extended nail to the shape I need using a file. This base gives an elastic nail, but at the same time strong, it lends itself well to a file - you create an almost complete feeling that you are working with a natural nail. If there is excess thickness, it can also be cut off without any problems.
This is what my nail looks like after filing

 Once again I adjust the length, file the sides, remove some blemishes, and the nail is ready for further coating. It takes at most 10-15 minutes to write about everything, I write longer)
Next, I decided to give myself a complete gel coating; for this I used the same rubber base and Masura Teal Leopard gel polish. Do you see the difference?)
This base wears well, the nail itself is not wooden, it can be removed simply by soaking it normally. 
Thank you for watching) I am Lena. I hope this was helpful.
My method is aimed at painlessly growing the free edge of the nail. I don’t advise anyone to grow their nails this way and walk around with them for months, and I don’t do it myself.
For the fair sex, manicure is another way to emphasize your style and femininity. But, for sure, every girl has encountered a situation where a seemingly perfect manicure is spoiled by one nail that breaks at the wrong time. For many girls, this means that everything else will also have to be cut down and trimmed. But what if you don’t like this way out of the situation? Is it possible to fix a broken nail and make it look as good as before?
If a nail suddenly breaks, there is no need to file off the rest! I'll show you how to repair a broken nail.

Broken nail? Nail repair at home
Each of us, if we suddenly break a nail, asks the question - what to do? If the damage is not that serious, it can be neutralized with a simple nail file. But if there is a more serious problem before your eyes, it is worth taking other measures.

To make your manicure look neat again, you will need special nail glue and a tea bag. Surely many people know about this method, but repetition is the mother of learning.

It is necessary to pour the tea leaves out of the bag and cut off a strip from it, which in its area can cover the damaged area.

Then you need to apply glue and glue the strip. After waiting for the first layer to dry, you need to repeat the procedure and again wait until the glue dries.

Repairing a broken nail in a salon
Unfortunately, experts have not yet found a universal way to fix a broken nail. It is no wonder that every second of them advises the girl to visit a specialist, where he, as a professional, will help correct the unpleasant situation.
One of the ways to fix this is to repair the nail using special silk and bio-gel coating. This method will allow the girl to forget about the problem.
For extended nails, the above method may also be suitable, the main thing is to remember that the glue that will be used on natural and artificial nails should be different.
If the second one can withstand persistent glue, then this can cause irreparable harm to the first one. It may even lead to forced removal of the nail plate, since the particularly resistant glue is not intended for natural nails.
However, even if the artificial nail breaks along the edge of the smile, you can forget about using such a product, as this will also lead to disastrous consequences.
It should be noted that in fact, the tea bag method is a kind of universal “first aid” formula. It is necessary to understand that this option of salvation is rather temporary and it is better not to delay going to the salon.

Fortunately, girls are able to complement their look with such a fashionable accessory as a manicure, but, unfortunately, it requires enormous care and patience, because growing nails to the desired length is not easy, but maintaining this length is even more difficult!
How to repair a broken nail master class
Read how to do it here.