Set for nail extension composition. Nail extension kit: what should be included in this kit
Until recently, many women signed up for nail extensions with a specialist at a beauty salon or used the services of private specialists at home. But today we prefer to independently give our nails the desired shape and length at home, making fashionable nail designs with beautiful designs or patterns. Fortunately, prices for starter kits for nail extensions have dropped noticeably, and with the help of step-by-step video lessons for beginners, any of us can easily cope with this procedure. If you have all the materials and tools necessary for the work at hand and you strictly adhere to the correct technique for modeling nails with gel, then the structure of the natural plate will not be damaged, the hardened gel will hide all defects, and the extended nails will not peel off. Don't be discouraged if the procedure takes a long time the first time, as most beginners complete the job in 3-4 hours.
From this material you will learn what you need to buy for home gel nail extensions. One of the most necessary accessories on the list rightfully includes an ultraviolet lamp. The choice of this device must be approached with special care, since your comfort during the procedure, as well as the decorative appeal and natural appearance of the extended nails, will depend on the quality and speed of polymerization of the gel layers. In addition to drying the gel coating, you can use a UV lamp to work with acrylic and gel polish. It is advisable to choose a device from a well-known brand with a power of 24-36 watts with the ability to place all your fingers in the working area. For personal home use, a device with fluorescent lamps is quite suitable, and if you are going to provide private manicure and pedicure services to clients, then it is best to buy a device with long-lasting LED lamps (LED lamp). Having a built-in timer will be an obvious advantage of the selected UV lamp.
♦ WHAT IS INCLUDED IN THE STARTER KIT
NIPPERS AND TONGS.

Professional nippers can easily and safely remove overgrown cuticles, get rid of hangnails and protruding corners of the nail plates. This tool with a well-sharpened working surface is considered more reliable than a trimmer or scissors with curved tips;
BRUSHES.

It is advisable to have on hand several flat brushes with a straight tuft of bristles, a few thin ones and a tapered tip at the end of the tuft. To apply the gel and model the nail, it is best to use brushes with fairly hard artificial bristles;
TYPE CUTTER (BOAT).

If you use tips for nail extensions, then you can buy inexpensive blanks with long tips, which are cut with a tip cutter and the shape of the free edge is adjusted;
BRUSH.

After correcting the shape of the free edge and sanding the hardened surface of the gel coating, dust appears, which must be periodically shaken off with a manicure brush with synthetic bristles;
Materials:
GEL. 
Nowadays, gel for nail extensions has noticeably replaced acrylic powder in popularity, since high-quality material quickly hardens during polymerization in a UV lamp, and nails look natural after modeling. There are single-phase, two-phase and three-phase gels for nail extensions on sale. Single-phase gel acts as a base, modeling and finishing agent. The two-phase gel combines modeling and protective functions (used after applying the base). A three-phase system involves the sequential use of a base, modeling gel and top gel. Additionally, you can use camouflage gel with pigments in nude tones, which visually lengthens the nail bed;
FORMS.

Extension on forms is the most popular way of laying out gel to model the free edge. Most often, paper templates are used in rolls, from which disposable forms are separated, secured under the tip of a natural plate, and gel is spread on the surface of this thick paper. There are also so-called top forms made of thick plastic, which are filled with gel and fixed over the natural nail before polymerization in a lamp;
TYPES.

Tips are very convenient to use for beginners, since you don’t need to have even basic modeling experience; just carefully study the step-by-step video tutorials on nail extensions using tips. These devices are made from very elastic and durable ABS plastic, which can be easily processed with a nail file to give the desired shape. This artificial nail consists of a free edge area, a contact area (on which glue is applied) and a projection (stop line) between these areas to fix the natural nail;
ORANGE STICKS.

Sticks are very convenient for adjusting the shape of the free edge while laying out the gel on forms (or tips), and also to prevent the gel from spreading. Using sticks, it is convenient to transfer rhinestones, kamifubuki, bouillons and other small decor to the coating while designing extended nails;
DEGREASER.

Before applying the base layer, each nail is treated with a degreasing agent so that the gel evenly fills the entire surface of the nail plates;
PRIMER.

This product is used to treat nails for perfect adhesion of the gel coating to the natural plate. There is ultrabond (acid-free) for delicate dehydration of fragile nails and nail-prep (acid bond) for the active opening of keratin scales of the plate;
KLINSER.

A special liquid for removing the sticky dispersion layer from a hardened gel after polymerization in a UV lamp;
CUTICLE OIL.

The cuticle is treated with softening oil after extensions so that the delicate skin does not become covered with cracks and hangnails;
LINT-FREE WIPES.

They are sold in the form of a roll from which small pieces are cut off to wipe the nail plates or dip into the product and treat extended nails.
♦ VIDEO LESSONS FOR BEGINNERS
Dear girls! We will be grateful if you share your secrets, experience and methods of modeling nails with gel on tips or on forms at home.
If you want to post your photos and video materials on the topic on the site, please write a message to us by email: This e-mail address is being protected from spambots. You need JavaScript enabled to view it. To the main page
ALSO FIND OUT...
Marina Ignatieva
Reading time: 9 minutes
A A
Have you decided to do your own acrylic nail modeling and do it? Before you go to the store, it doesn’t hurt to find out what should be in the set of tools for acrylic technology, how much these tools will cost, and what will be more convenient – tips or forms.
What you need for acrylic nail extensions at home - starter kit for extensions, prices
 Based on the indicated price range, remember that for the first time it is absolutely not necessary to purchase the most expensive products. Moreover, this technology may simply not suit you, and as a result, the money will be wasted. Start small.
- Hand disinfectant. Price – 500-1000 rub.
- Tool for disinfecting instruments. Average price - 500 rub.
- Files for filing natural nails. Price – 100-300 RUR/piece.
- Files for filing and polishing acrylic nails. Price – 100-300 rub.
- Monomer(needed to dissolve the powder). Price – 300-2000 rub. It is better not to skimp on this liquid.
- Acrylic Powder(white - for a jacket, pink, colored). Price – 100-300 RUR/piece.
- Primer(needed for adhesion of the nail and coating). Price – 200-700 rub.
- Dust brush after polishing your nails. Price – 500-700 rub.
- Brush for distributing acrylic (preferably several). Price – 400-2500 rub.
- Bonder(needed to wash off dried acrylic from the brush). Price – 600-800 rub.
- A couple of stacks(cups) for working with acrylic.
- Pusher. Price – 200-500 rub. Or orange sticks. Price – 50-300 rub.
- A solution that softens the cuticle. Price – 200-500 rub.
- Cuticle oil(for the final stage of extension). Price – 150-1500 rub.
- Tips. Price – 350-1500 rub.
- Glue for tips. Price – 100-600 rub. Liquid glue dries instantly. Glue gel – about a minute (it will cost more). The second option is optimal for wavy nails - it evenly fills all the cavities of the nail plate.
- Tip cutter. Price – 100-200 rub.
- Finish coating. Price – 400-600 rub.
The best brush for acrylic extensions – what is it?
One of the most important criteria for choosing acrylic brushes is the density and elasticity of the beam, as well as the sharpness of the tip.
Also remember:
- Don't skimp on brushes. The quality of your manicure will largely depend on the quality of your brushes.
- The best brushes are made from kolinsky, sable and marten. Cheap ones - made from squirrel.
- Brush handle should be light and comfortable.
- Marking: for modeling – No. 6-12, for design – No. 1-6. For extensions, as a rule, number 8 is used.
- Brush shape. To create a thin layer of acrylic on the cuticle area - oval, with a thick “belly”, with a flattened base, a thin tip. For acrylic modeling - the same, but smaller in size.
Don't forget that a new brush is usually coated with a special factory glue. Therefore, before starting work, the brush should be washed.
Necessary files for acrylic nail extensions at home
In order for the acrylic nail extension procedure to go perfectly, files and polishing blocks must be selected in different degrees of hardness:
- For filing edges– coarse abrasive files.
- To remove shine from your nails - polishing blocks of minimal abrasiveness.
- For modeling– files of medium abrasiveness.
Acrylic powder for home acrylic nail extensions
Differences between high-quality powder for acrylic modeling:
- Tight fit to nails.
- Easy filing and processing.
- Porous structure for maximum air exchange.
- Does not crystallize, does not spread.
When using high-quality powder, acrylic nails do not peel off, are highly flexible and do not break.
Choosing forms or tips: their advantages and disadvantages for acrylic nail extensions at home
What is the difference between types and forms? Tips is a special plastic that, when glued to the tip of the nail, is used as a backing for acrylic. A forms They are a specially shaped adhesive paper placed under the nail. The future strength of nails does not depend on the modeling option, but tips are more convenient for a beginner
(forms require skill).
What are the differences between these two options?
Tips for nail extensions - their advantages
Disadvantages of tips
- Flatter nail shape.
- Inability to create an edge, gothic stiletto, side or pipe.
- The weak point is the gluing area. If the tip was glued poorly, the nail will fly off very quickly.
- Tips are a bad solution for wide nails. And also for those growing down.
Forms - their advantages for home nail extensions
Disadvantages of forms
- Not everyone can create a beautiful shape with their help (you need experience and talent).
- Extending injured nails using forms is very difficult.
Millions of women constantly visit beauty salons to give their nails a flawless look. Some people have naturally ideal nail shapes that only need hygienic care. But there is also a category of women who cannot boast of a model manicure due to the irregular shape of the nail plate.
Modern fashion does not stand still and allows everyone to look beautiful and attractive. Many beauty salons offer nail extension services. Professionals, using special devices and materials, create artificial nails that are in no way inferior in appearance to natural ones. But this procedure is quite expensive and takes a lot of time.
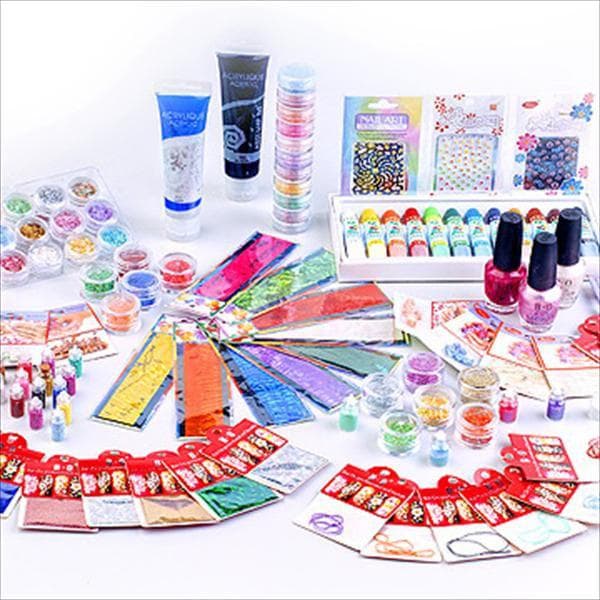
To make life easier for fashionistas, we offer complete. It includes everything you might need to create high-quality and beautiful nails at home.
The kit includes professional materials and tools. The 36 W ultraviolet lamp can be used with any gel coatings that are marked UV.
Instructions for using an ultraviolet lamp
- Insert 4 ultraviolet lamps (included) into the device;
- Connect your device to the network;
- Turn on the light using the black button on the back of the device;
- If the red indicator lights up, the device is ready for use;
- If the indicator does not light up, press the white button.
Equipment
- x 1 piece;
- Cuticle oil x 1 pc.;
- Cutter x 1 piece;
- Nail spatula x 1 pc.;
- UV gel for nail extension x 3 pcs. (pink, white, transparent);
- Paint brushes x 8 pcs.;
- Cuticle spatula x 1 pc.;
- Rhinestones x 12 colors;
- Beads for decorating nails x 12 colors;
- Glue x 1 piece;
- Liquid for removing adhesive layer x 1 pc.;
- Nippers x 1 pc.;
- Nail forms x 20 t.;
- Files for polishing nails x 2 pcs.;
- Tips x 100 pcs.;
- Gel for nails UV x 12 pcs.;
- Cleaning brush x 1 pc.;
- Artificial finger for training x 1 pc.;
- Mixing container x 1 pc.
Characteristics
- UV lamp power: 36 W;
- Lamp size: 25 x 22 x 9 cm.
- Voltage: 110 – 240 V.
Gel nail extension kit
Any girl pays enough attention to caring for her hands and creating a manicure, because even the tiniest detail in her appearance matters, even such a trifle as the length of her nails.
Alas, not all ladies can afford to have “big claws.” For most ladies, they are weak, flake and crumble. If you are also faced with a similar problem and want your pens to look perfect, don’t be discouraged: there is a way out!
"Cosmetic Store" invites you to take a closer look at such a service as nail extensions. We will give you all the necessary advice to help you learn how to do a similar procedure yourself.
What is included in the gel nail extension kit?
The initial set must include:
In our time of developing technological progress, any nail technician can choose, guided by his preferences, different types of lamps:
- combined UV-LED;
- conventional UV, power 36 V;
- standard UV, power 9V (weaker than the previous version);
- CCFL.
To extend nails with gel, it is necessary that the substance be amenable to polymerization when irradiated with one of the above types of light devices.
This drug is required to be used when applying gel polish or “claw enlargement.” The primer performs the function of degreasing so that the polymer fits better without streaks on the nail plate.
This product is divided into two subtypes:
- helium (dries under the influence of a UV or LED lamp, while the nail retains a glossy surface);
- acidic (has an unpleasant pungent odor, does not require drying, the nail has a matte tone).
The modern cosmetics and varnish industry offers a wide catalog of products to choose from that can satisfy any customer needs.
Of course, you can buy a name brand remover, but why pay extra when regular rubbing alcohol can easily replace the brand name product?
"Cosmetic Store" advises you to purchase sets containing a wide variety of brushes - this will make it easier for you to create a magnificent manicure without a single flaw.
Of course, not a single set for gel nail extensions can do without the presence of the gel itself - after all, it is this that adds noticeable length to the “claws”. The variety of these products makes your eyes wide open, so there is plenty to choose from. Be careful and do not forget to check the expiration date when purchasing - a spoiled product does not apply well and has terrible durability.
- any types of stickers;
- colored varnishes;
- pigments;
- sparkles;
- translations;
- dried flowers;
- fimo-design;
- finish gel (gives strength and gloss to the nail plate).
Don't be afraid to experiment and don't limit your imagination in search of the perfect manicure!
Their main purpose is to remove sticky mass.
These are plastic tips that resemble the free edge of a marigold. There are these types of tips:
- By contact zone- the area where the tip is glued to the nail. This place can be large or small, contact size or not, deep or not very deep. The contact zone is completely selected depending on the natural characteristics of the hands. If the bed of the nail plate is not long enough or the “claws” are bent down, then the contact area must be minimal. By the way, you can cut it down if you don’t want to buy tips.
- According to the form.
According to this criterion they are divided into:
- straight;
- tapered;
- classic;
- curved.
Most often, classic tips are used for manicure, which are most successfully disguised as the bend of the nail.
These are templates for shaping the manicure, which are removed after the material has dried. Forms can be:
- disposable (paper);
- reusable (Teflon) - after each use they are disinfected and can be used again.
They give the manicure the necessary outline. Natural nails require a file of more than 180 grit, and extended nails need less than 180 grit.
To give an artificial nail a shape, the abrasiveness of the tool is required from 120 to 180 grit, and for primary length correction - no more than 100 grit. The 240 grit file is universal in use.
If you want to give the “claws” shine, take a sanding product with a force of 900-1200 grit. Also, when creating and correcting a manicure, you will need a special brush to remove sawdust.
Designed to soften the cuticle and is mandatory for use in the final stage of nail extension.
Always remain perfect by following the advice of "Cosmetic Store"!
Modern women have so little time for themselves, but they always want to look perfect. An important part of the overall impression is made by the hands, or more precisely, by well-groomed nails and a beautiful manicure. New technologies will come to the rescue, allowing you to preserve the coating for up to three weeks without damaging the appearance. As a rule, the only drawback of such a transformation will be the significant cost. That is why the desire to independently study and master the basics of gel extensions is completely justified. A list of everything and a complete description of the necessary materials used for extensions is given in our article.
What is the procedure
Using a special nail gel will allow you to quickly and easily obtain a durable and completely natural-looking coating.
In addition to the decorative effect, such gels can strengthen the fragile nail plate, preventing the formation of cracks and chips along the edges.
The procedure is not complicated; with the right amount of effort, you can master the basics of gel extensions on your own.
Of course, this matter cannot be done without special materials and tools. Most questions on this topic relate specifically to the list of everything you need, because the choice of modern stores will confuse anyone.
To accurately determine the feasibility of purchasing a particular tool, our article discusses in detail all the necessary devices.
Video list
What is needed for gel extensions?
The convenience and speed of extension directly depends on the professional skills of the performer, as well as the availability of all the necessary equipment. It is worth taking care of purchasing everything you need in advance, and also conveniently placing the tools within easy access.
After carrying out several procedures, you can easily determine for yourself a comfortable location and algorithm of actions. 
Tools
You can stock up on everything you need in specialized stores. Consultation with sellers will help you choose the best option in terms of cost and quality.
UV lamp
Files and buffs
The nail plate must be carefully treated before coating.
This will ensure strong adhesion to the polish and will also help correct the shape of the nail.
There are files of various configurations and abrasiveness. Best to buy right away a set of three to four files of varying roughness. In the process of creating a manicure, you yourself will determine the coating that is comfortable for yourself. Usually this indicator directly depends on the condition of the nails.
File - buff It has a square cross-section and lower abrasiveness. Its use greatly facilitates the work of the master, and they are short-lived, so it is better to immediately purchase several pieces in reserve.
The cost of a good set of various nail files will be within 600 rubles depending on quantity and size.


Manicure set
A prerequisite for the formation of beautiful nails. The type and configuration can be selected according to your wishes, the main thing is that the set includes good scissors and. With their help you can quickly remove hangnails and cuticles.
Before applying gel polish to your nails, you must trim the edges of your nails and remove excess skin around the plate.
This is what will ensure good adhesion and durability of the applied coating.
The cost of a good manicure set starts from 100 rubles and above. It is also worth considering that, if necessary, the tool will have to be sharpened by a professional.
Inept sharpening done independently can damage the blade and render it unusable. 
Orange sticks and pusher
Such devices do not have a luxurious design, but are absolutely necessary for caring for the cuticle. Additionally, you can use such devices for applying rhinestones and adjusting the gel coating.
Costs vary within from 50 rubles and above.
Set of brushes
They will be absolutely necessary for decorating the nail plate. Thanks to the many videos on the Internet, you can learn simple techniques on your own. Manicure brushes of various diameters are very useful for this.
Good brushes will cost from 80 rubles and above.
The cost will depend on the materials used, as well as the brand of the manufacturer. 
In addition to the above tools, others will also be very useful. improvised devices.
These are brushes for thoroughly washing hands and nails, toothpicks for distributing decorative elements or mixing colors on the surface. It would be a good idea to stock up on aluminum foil and lint-free wipes to remove the sticky layer after the gel coating has polymerized.
Master Video List
List of materials: lamp, gel polish, primer, brushes, etc.
The algorithm for performing gel extensions is not complicated, especially when everything you need is purchased in advance.
Typically, craftsmen prefer to use materials of the same brand, then there is less risk that the components will negatively affect each other.
For home use It is also better to adhere to this rule, because this directly affects the durability and quality of the coating.
What you need to buy:
- Gel - varnish. This viscous substance hardens exclusively under the influence of ultraviolet rays in a lamp. There are three types by type: single-phase, two-phase and three-phase. For home use, it is better to take single-phase varnish, as it is easier to use. The cost of varnish will be from 140 rubles per unit.
- Primer for degreasing nails. This is a mandatory condition so that the coating does not swell and does not become covered with bubbles subsequently. Primers are divided into acidic and non-acidic. They differ not only in the effectiveness and composition of the product, but also in their effect on the nail plate. An acid-free primer is much preferable in this regard, but its price will be approximately 300 - 350 rubles, which is approximately half as much as its acid-containing counterpart.
- Finish coating ensures the strength and durability of the manicure. You can’t save on it, so a good “finishing” gel costs around 400 rubles and more.
- Colored gel varnish can be classified according to many criteria. In addition to the composition, color and form of release, it may differ in additional “special effects”, for example, magnetic particles in the composition or the ability to change tone depending on the ambient temperature. The cost of colored varnish varies widely. Usually craftsmen do not attach much importance to this factor, because colored varnish does not affect the durability of the coating. If your budget is limited, you can save money by purchasing this component.
- Nail degreaser can be successfully replaced with concentrated medical alcohol. Leading manufacturers of manicure products offer gentle compositions without acetone, but their cost will be slightly higher than traditional ones.
- Forms for nails are not considered priority materials. Usually they are used after several independent extensions have been completed. Forms can be made from disposable paper, as well as plastic and metal analogs that can be used for a long time. The use of such devices will help even inexperienced performers perform a symmetrical manicure.
- Tips for nails - a modern analogue of false artificial nails. They come in different shapes and sizes, are small in thickness and create a completely natural look for the nail plate. Skillful use will help you create a real masterpiece of nail art even on short and weak nails.

Additionally, you can purchase white and transparent gel polish to create visual effects, as well as decorative elements for the nail plate.
The type and texture of these materials selected individually, usually even with a minimal set you can create an excellent manicure.
Does it make sense to buy ready-made kits?
Beginners are often advised to purchase a so-called starter kit, which includes all the necessary attributes. Usually the cost of such sets is slightly higher than average, but there is no need to purchase anything additional.
Whether to buy everything in a complex is up to you to decide; usually you should pay attention to ready-made sets from leading manufacturers of coatings and manicure products. Great importance The included lamp also has one, because the cost of the kit largely depends on it.
On average, a good set for beginners just mastering the art of gel extensions will cost from 3000 rubles and above.
Also the price will depend depending on the completeness and quantity of products, because in addition to the main coatings, the base of colored gel varnishes can vary.
Video review of the finished set
The gel coating looks great on nails, giving its owner confidence in her own irresistibility. Many ideas for beautiful design, as well as skillful decoration of the nail plate, have long become a real temptation for the fair half of humanity.
You may be interested in this: how to remove split ends along the entire length, which helps with split ends of hair.
In order to reduce the regular costs of getting manicures done in a salon in the future, you can master the gel extension technique yourself. To do this, you won’t need many tools and materials, and besides, such a hobby can eventually become a good source of income.
Our article will tell you what you need to purchase to perform a gel manicure yourself.


