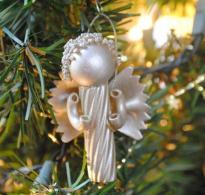
How to make a dry felting toy step by step description. Step-by-step wool felting for beginners
At first glance, wool felting for beginners may seem like a rather complicated process, but it is not - all you need is patience, a little skill and choosing the right technique.
Wool felting techniques
There are 2 main techniques for felting wool, the process of creating products is fundamentally different. That is why it is difficult to say which style of felting is easier for beginners to master - here everyone chooses what they like.
Wet felting
It was wet felting from wool that gave the name to the technique of creating warm products.
You need to wet a piece of woolen material with a simple soap solution and begin to roll the product in your hands, giving it the desired shape. Since wool decreases in size when felted, the work requires 2-3 times more material than the size of the future product.
There are 2 methods of rolling: the first involves rolling a wet lump in your hands, which produces voluminous crafts. In the second, the wool is spread evenly in a thin layer on a bamboo mat, moistened with a solution, and covered with film. The resulting workpiece must be rolled into a medium-density roll and rolled for a long time, gradually increasing hand pressure.
The latter method is used more often - it allows you to make beautiful bright fabric with the effect of a marbled transition of colors, sometimes it is also similar to the patchwork technique. However, wet felting for beginners works better if you work with three-dimensional figures.
It is customary to create paintings, clothes, bags, scarves and capes, accessories, and jewelry in this style.
Dry felting
Dry felting is done in a completely different way. Prepare a ball of fur and roll it a little between your palms, giving it the desired shape. Take a special needle with notches and start poking it into the ball often, often - this tangles the wool fibers inside the ball, holding them together and compacting them.
You can understand that the part is ready by lightly pressing it - the workpiece of the required density will return to the shape that you gave it before squeezing. Then the fibers will no longer tangle, but tear.
Dry felting from wool is used to create three-dimensional figurines of animals, fairy-tale characters, people - they can be used as ordinary figurines or toys.

Felting wool for beginners always seems like a very long and labor-intensive task. However, the result of each lesson pleases and motivates needlewomen to continue creating amazing woolen works.
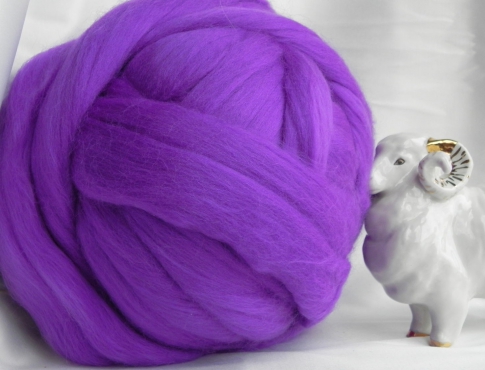
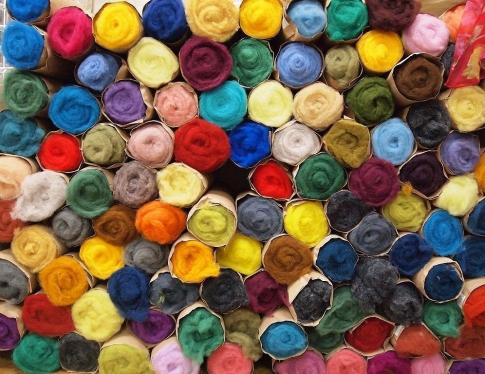
Wool for felting
It is no secret even for beginners that the felting technique chose wool as the main material. It comes in different textures, densities and colors, and each variety is used for specific purposes.
Tops
Tops wool, or comb tape, is of the highest quality - it is actively used in both wet and dry techniques. The material is well combed, the fibers are soft and lie in the same direction. It is also called spun wool.
In its raw form, the workpiece resembles a woolen ribbon, from which scraps can be torn off.
Wool wool
Another type of wool is called carding due to the large brushes (cards) that are used to comb it. Unlike tops, in carded fibers the fibers are multidirectional, and the material itself is more like cotton wool.
This type of wool is cheaper than comb tape and is therefore suitable for beginner handicrafts. Properly made products made from wool wool look no different from a top.
Sliver
This is the name for combed, cleaned, but not dyed wool, which is used as a base - if you make the entire toy from tops or carded, too much expensive material will be wasted.

In addition, this variety is specially created to serve as stuffing - it is denser and therefore holds its shape better.
Tools for work
Special devices are needed mainly for dry felting. Wet felting from wool involves more work of fingers and palms than special tools.
Needles
Dry felting of wool is usually done using special needles in the shape of the letter L with notches on the tip - they tangle the hairs of the wool, compacting the material and forming a certain thing out of it.

For beginners, it is very important to remember the classification of needles by number:
- No. 36 - the coarsest, used at the initial stage of material processing;
- No. 38 - thinner, the main felting is performed with this number;
- No. 40 is the thinnest needle used for processing small parts and decorative elements.
In addition, there is a needle with notches directed in the opposite direction - it does not mat, but pulls out the fibers, and is suitable for giving toy animals fluffiness.
Felting machine
Automatic needle alternative - can hold up to 12 or more needles in the nozzle! It is understood that the device allows you to speed up the processing time of the product several times. This device is especially useful when working on flat things.
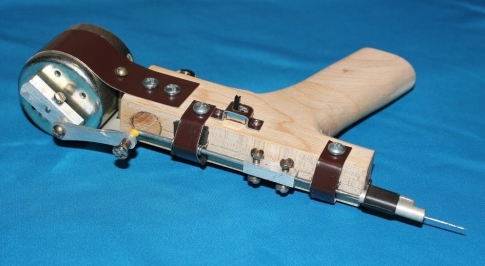
However, before purchasing it, you need to get used to working with needles and practice well - this is especially true for beginners.
Substrate
In other words, the mat on which you work. Its presence is important for several reasons:
- due to the hard surface under the work, the needle can easily break or bend;
- holding the product suspended is also inconvenient - you can accidentally prick your finger.
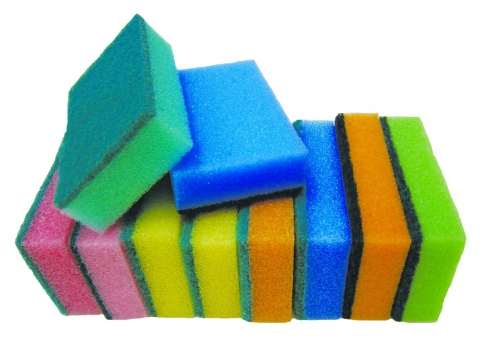
It is not necessary to buy a special backing - instead, use foam sponges, thick hard brushes, felt mats or foam blocks.
Tip for beginners: felt is considered the best material! It does not fluff up bristles like brushes, does not leave pieces of foam rubber in the work and does not make unpleasant sounds when pierced like polystyrene foam.
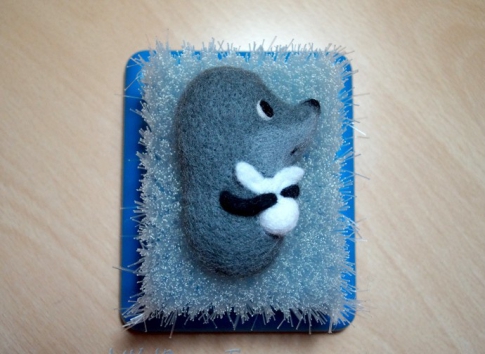
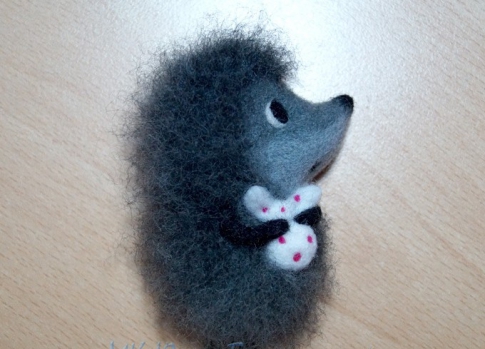
Master class: DIY hedgehog
Below is a master class on dry felting for beginners - you can make a cute brooch in the shape of a hedgehog from the cult cartoon “Hedgehog in the Fog.”
You will need: carding in black, dark gray, light gray, white and red, needles of all thicknesses, a brooch clasp, Moment glue, soap and hot water.

Wet felting from wool was used to create some small details.
- Place a small ball of black wool on the backing and thread along the entire length with a #38 needle.
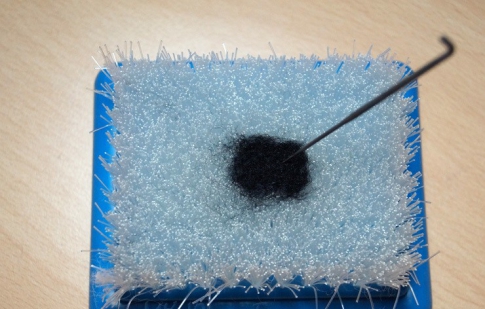
- Roll the piece into a roll, put it back on the backing and let it go.

- One side of the paw should remain fluffy; do not touch it.

- Completely wet the workpiece in warm water. Lather your fingers well and begin to gently rub the paw from all sides.
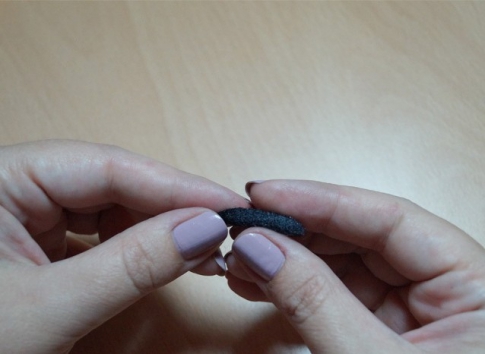
- Now place the “sausage” on your palm and roll it, covering it with your other palm on top.

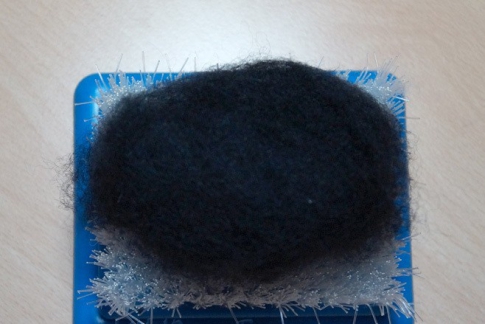
Rinse the workpiece in clean water and send to dry. Make all 4 legs in a similar way: longer for the legs, slightly shorter for the arms.
- Prepare a ball of black wool approximately 10 centimeters long, 3 centimeters high and 3 centimeters thick. Lay it out in the form of a flat oval on the backing. You can choose other parameters, but remember that the material will be reduced by about a third in the work.
- Start felting the product with a needle number 36, moving across the entire area of the oval. Stick the needle in the center at a right angle, decreasing it towards the edges.

- When the lump turns into a dense, plump oval, wrap it in dark gray wool so that the black color does not show through.
- At this stage of work, use a needle No. 38. Stick it in not so deeply - the black layer is already quite dense, you need to felt the gray wool.
- When the torso is ready, do the nose. Place a small triangle of dark gray wool on the backing and work it with a size 38 needle.

- Roll the workpiece into a roll and go through the needle again, leaving the wider edge fluffy.
- Now work the base of the triangle - you will end up with a cone that is dense on all sides. Roll a small black piece onto the tip of the cone - this is the spout.

- Attach the nose blank to the body and felt it, working with a needle on all sides at the base.

- If the shape of the nose or body does not suit you, you can always correct it by rolling a scrap of a suitable color in the right place.
- Take a flat, small piece of light gray color, straighten it and roll it under your nose, marking the mouth area.

- Now polish the product - stick the needle shallowly and as often as possible. Each puncture should be as close as possible to the previous one.

- Roll out an oval from a tiny black scrap and secure the eyes in place.

- Place white around the black oval and secure the white around the pupil.

- Make a mouth in the same way.

- Roll a small white ball, roll it with a needle No. 38. Using the same needle, secure it to the hedgehog. Place small white “petals” on top to create a road knot.

- Attach the handle paws to the top of the knot.
- The legs need to be secured by rolling the free side to the “back” of the brooch. On the back side of the hedgehog, make a recess for the fastener - often go through it with a No. 36 needle in the right place.

- Place the clasp in the recess, cover the top with a pre-felted rectangle of dark gray wool and secure with a No. 38 needle.

- Use felting to decorate the knot with little red polka dots - this can also be done using beadwork.

- Go over the entire surface of the brooch with a needle with reverse lint. Stick it not very deeply, but often, to get fluffiness - hedgehog spines. Leave the muzzle and knot smooth.
Remember that even for professionals, felting wool from one product takes from several hours to several days, despite the fact that the work progresses easily. The main thing in this matter is to be able to wait and watch how a wonderful little animal emerges from a simple piece of wool!
You can learn another simple lesson for beginners from the video - it shows how to felt a flower from wool.
I did this master class specifically for my blog. It is mostly aimed at felting beginners. Therefore, I made it as accessible as possible, with a bunch of photographs and a detailed description of each action. The resulting cats are quite cute and easy to make.
I am not actively involved in NM (I don’t know why, somehow it didn’t work out). Therefore, most likely, there will be a lot of shortcomings in the publication. I will be glad to receive any instructions =)
I wish you pleasant viewing =)
And today we will make these cats

Here's what we need:

What we need:
1.Wool. Preferably 2 colors. I advise you to take contrasting colors.
2. Needles for felting. Coarse (No. 36), fine (No. 38 or No. 40), reverse needle No. 40 (optional)
3. Wire(or pipe cleaners)
4.Plastic(I had my eyes prepared in advance). If you don’t want to bother with plastic, you can make eyes from fur (drive it into the toy itself)
5.Glue(moment gel or moment crystal)
6.Acrylic paints and brushes(if the eyes are made of plastic)
7. Cosmetics or pastel crayons(for makeup)
8.Ribbon/rope/beads/charms or whatever you come up with for decoration yourself
not necessary, but it wouldn't hurt:
- Puhoderka
-
Felting mat/sponge/brush

Making the cat's body.
To do this, comb the required amount of wool. If you use combed ribbon, fluff it with a slicker or simply tear it into fluff with your hands. This can avoid unsightly seams on the cats body.

We take this fluff in our hands and carefully begin to dump it with a coarse needle. During felting, wool loses a lot, about a third of its original volume! This is important to take into account in order to figure out the size (during the master class I will often take photographs in my hands. You will visually see how its volume changes. The ball that I now hold in my hand will be the butt of the gray cat that I am holding in the first photo)

This is approximately how much fluffy wool is required to get a ball like this.
The resulting ball should be quite a bit hard. Now it is still quite flexible and easily deformed. There is no need to push it all the way. For now we are just assembling the blank.

But the ball should not be very loose. The difference is even visually visible. The one on the right is correct, the one on the left needs more work =)
During felting, hold the needle perpendicular to the surface of the ball. If you fall at an angle, the fur will go under the already matted surface, so unsightly seams and stretch marks will appear.
During felting, insert the needle as deep as possible so that the cats feel inside too (this determines the durability of the toy)
I advise you to felt three-dimensional figures on your hands (not on mats or sponges). You will be able to feel the fur, this is important. We use mats for flat parts.
Carefully! The needles are sharp, you can get hurt! It's not very painful, but extremely unpleasant.
Drop 2 balls. One is larger, the other is smaller (the difference should not be very noticeable)
Making the neck
For felting wool, I use wire or pipe cleaners. In this post I will show both methods. Let's start with the ruffs.

Combing the fur

We put a brush in our cloud of wool

Wrap the brush with wool. We begin to fold carefully with a coarse needle.

To felt such parts, I advise you to use a mat or sponge (I use a brush). Also (if you have one) you can use a needle holder (I have 7, now there are 5. If you put all 7, then at least one will get into the wire).

We immediately mat the neck well, but leave the tails fluffy (otherwise we don’t mat it or we do it unattractively). Cut off the excess part of the pipe cleaner (adjust the length of the neck to your taste). We don’t pull the brush too hard! It might fly off =)

We fluff up the tails of the neck and roll them onto our two balls. If the ponytails are not fluffed up, there will be unsightly seams.

As a result, we get a fluffy weight like this =)

Prepare the same amount of fur for the ears.

We make triangular ears (I recommend using a mat for this). First we cut it with a coarse needle, then with a fine one. Leave the bottom of the ears fluffy. And then we roll it onto the cat’s head (on one of the balls of our fluffy “dumbbell”).

As a result, we will get something almost like a cat! But for now it is very loose. This is just the beginning. It takes about an hour to an hour and a half to make a blank like this.

Our assistant is quietly sleeping at this moment =) We have time to pour another cup of tea.

Now we make the second cat in a complete analogy, only a little smaller, we make the neck a little shorter.

Our gentleman is not bored yet and is waiting for his lady in the company of other losers)

Here, the bodies of our cats are ready. It took me about 2.5 hours in total (if I hadn’t been constantly distracted, maybe the process would have gone faster)
Faces
The fun begins. We make personalities out of our blanks.

We mark the locations of the eyes and mouth. She's still kind of ugly =) But this is just the beginning. We found the places, we do the whole facial expression.

For now we do everything with a rough needle. Making eye sockets

Making the lower lip. We dump a small piece of fur, place it under our cat’s pads, and roll it down.

Let's build up the cheeks. We make the desired shape of the head (it’s not good for a lady to be round like a watermelon). We roll up the nose (I have a blue one)

This is what we get.
IMPORTANT!!
Maintain proportions. The fur is now walking around, while you fall off the eye sockets, the skull will definitely suffer. We make cat, not flounder. Increase where there is not enough.


After assembling the cats, you can “poke” them with a coarse needle and begin processing them with a fine one. But we’re still not completely done yet. We still need to attach a tail to the body)
Tails
Now let's start making our woolen heart.

The same technique can be used for the neck.
Cut the required amount of wire. Separate the rowing tape into small strips. We coat it with glue and begin to wrap it with wool. It should be wound tightly enough. In fact, we make a fluffy stick, onto which we then roll the required amount of wool for the tail.


In the first photo the fur is curled only like a skeleton. On the second, the tails grow into “meat”. We continue to fold these tails using the same technology as the necks. First we cut it with a coarse needle, then with a fine one.
Eyes
We make eyes from plastic according to the size of the eye sockets (my eyes were prepared in advance). For the eyes I use Premo plastic. If you choose Fimo plastic and cover them with acrylic varnish, then over time the eyes will become sticky (thanks to Anna Rumentseva-Ivanova for this tip, I’ll be honest - I didn’t know that) As for plastic from other manufacturers, I can’t tell you, I only used Premo =)


Glue it. We paint with acrylic paints. After drying, we varnish with acrylic varnish (they begin to shine and, of course, are no longer afraid of the environment, especially water)
Assembly
Our cats are almost ready. Left a little.


We roll the tails. We roll the tails immediately to death. My tail turned out to be heavy, trying to come off. But we “nailed” him forever) We also connect the bodies of the cats. This will allow the kids not to run away during quarrels =)

Here we are in the assembly. We process the surface with a thin needle (if you did not do this in the previous stages). The toy becomes more and more dense. The denser the surface, the more durable the toy. Ideally, the toy becomes very hard (like felt boots). I'm a little underwhelmed. This allows the toy to still remain soft.
You can leave it like that. Tie a ribbon around the neck or otherwise decorate. It's a matter of taste =) I suggest fluffing the cats too!
Important: adjust the degree of dumping to your liking. Remember, the harder the toy, the more like new it will remain. But the toy should not be deformed under physical impact. And if something gets wrinkled somewhere, then it should restore its shape on its own. If a toy is squeezed and it does not return to its original shape, the toy is undersize!
Final processing
So, we decided to fluff the toy.

To do this, we take a needle with a reverse tooth No. 40 and begin to push it monotonously. I got cats as if they had been electrocuted very furry and more like a cloud than a cat.

That's why we cut our hair.
But they are still somewhat faded. Give the girl a blush and highlight her eyes with the help of women's cosmetics. Or you can take crayons, rub them into small shavings with a utility knife, and then rub them in with a soft brush.
I used shadows.
The final feature is a ribbon and pendant.
We admire the result.

Stock up on patience, tea and something sweet.
Making these cats will take at least 6-10 hours.
I hope the post was interesting and succinct) If anyone still has (or has) any questions, I will be happy to answer =)
Thank you for your attention
Felting wool is a very relevant and interesting type of needlework. Suitable for older children (from ten years old) as well as adults. The technique is very simple, similar to modeling and requires care, as the needles are very sharp and can injure your fingers. The wool is screwed in, rolled onto a sponge or polystyrene foam, it takes the shape you need, then you complement it with other blanks and elements.
Toys can be felted from different types of wool. Wool is sold as combed strip or carded
Wet and dry felting from wool: what is the difference
Wet felting is used to make flat products, for example, various panels, appliqués, scarves, and felt boots. This technique requires a lot of space, water and soap. The wool is laid out on the table layer by layer and each is treated with a soap and water solution, then ironed by hand.

Wet felting is carried out using a soap or special solution
Dry felting requires less space. The formation of the product occurs with less effort, due to repeated piercing with a needle with barbed wool.
Using simple ball shapes as an example, many needlewomen make original beads, which helps hone a basic skill. There are many lessons on making insects, such as butterflies, that will uniquely complement your interior. If you look at simple lessons, you can make your own products such as felt animals, a hare, a bear, etc.
Wool for dry felting: classification
It is necessary to combine wool by color and texture; the shade or thickness you need may simply not be available on sale. Wool can be purchased in the form of carded or combed tape, and this material is also divided according to several criteria.

If you just decide to try felting, a sponge is an ideal option in terms of cost; there are also advantages - the back surface of the product does not fray when in contact with the sponge
Namely:
- Can be from different animals (camel, sheep, goat);
- By color (natural and dyed);
- With shine (angora and mohair) without it;
- Thin (for external work) and thick (to create a base for the product);
- Rough (felt felt) and soft.
Since needle marks form on thin wool during the felting process, and this affects the appearance of the final product. Carded - tangled fibers that resemble cotton wool, quickly fall off. Rowing tape - individual fibers collected into a tape. This technique produces interesting animals: a bunny or a bear, as well as a butterfly.
Dry wool felting for beginners
For the work you will need materials: carded card of any color, ribbon wool of different colors, felting needles No. 36, 38, 40, sponge and pastel or pencils and a brush for tinting.

At the initial stages, it is necessary to sink the middle well, sticking the needle very deeply into the toy; over time, a density will form in the middle of the toy
Where to begin:
- To begin, draw a sketch of the figure. You can draw a bird or a butterfly of different animals, decorations. It will be easier to divide any product into the parts it consists of if it has a sketch.
- The drawing is ready, then divide it into simple shapes, the body, for example, is a large ball, and the head is smaller, and so on, ears, tails, paws.
- We take the wool and divide it in different directions until a uniform texture is formed. The amount of wool depends on the size of the craft, but it will decrease during the compaction process.
- Using a thick needle, first roll the wool into a ball, using your fingers to shape the desired figure, then change the needle to a medium one.
- We compact the workpiece until all voids disappear.
- We supplement the base; if it does not turn out the way it should be, we apply a piece of wool to the missing part and carefully use a needle to first pass in a circle, and then polish the surface with a thin needle.
- If paired parts are needed, then they need to be made at the same time. We divide the wool into equal parts. Then we simultaneously felt two parts, alternately comparing them with each other.
- Small parts require special care. We take a thin needle and outline the outlines on the surface. Then it is better to take a cross-shaped needle, we go along the contours, thereby correcting surface unevenness and compacting the workpiece.
- If you need to bend the workpiece, bend it between your fingers, and then use a middle needle to pass through the bend several times to fix it in this position.
- The parts are connected to the main workpiece using safety pins. We fix each part and separately in a circle we roll them to the base.
We hide the unevenness of the joint by adding small pieces of wool and carefully go over them with a thin needle. These are the basic techniques that are used in the manufacture of felt products.
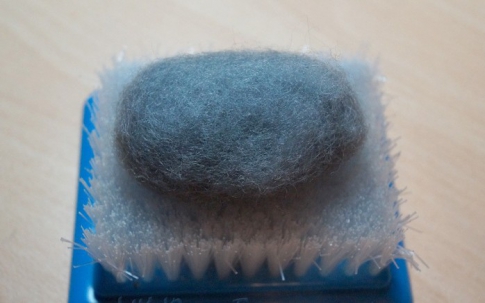
How to felt a wool ball: dry felting
In order to obtain a ball by threading, we will need: a special needle in the shape of the letter L with medium and fine notches, wool (for example, mohair), a rug (foam rubber backing). When all the tools are ready, protect your fingers with rubber thimbles.

Suitable for dry felting are Russian wool “Troitskaya” (thin, semi-fine) “Semyonovskaya” “Pekhorka” (thin, semi-fine)
Let's start making the ball:
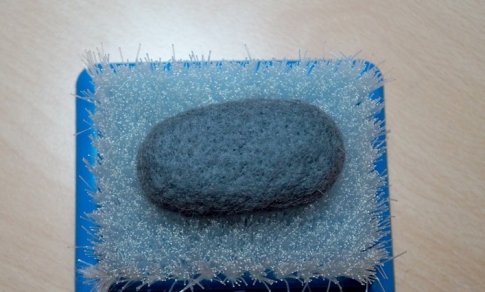
- Take a piece of wool from a common skein and rub it between your palms to form a tight cylinder.
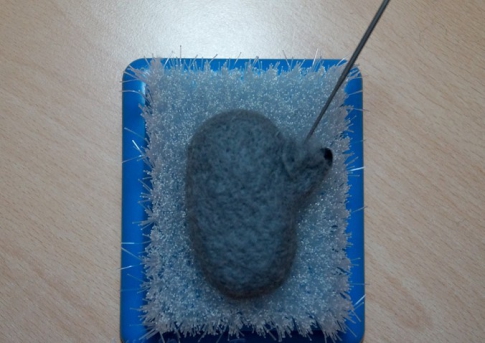
- Then we insert a needle into the cylinder perpendicular to the substrate and, with quick up and down movements, compact the inside of the workpiece.
- We turn the needle in a circle, continuing the movements up and down, the ball will be compacted, the upper surface will be leveled.
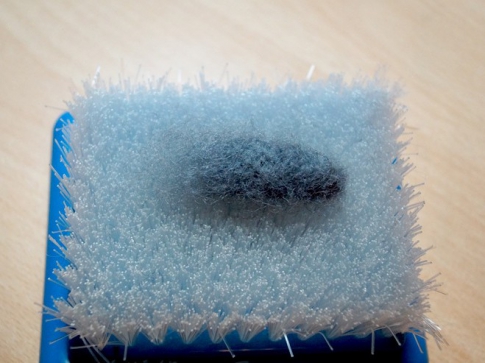
- In the process, we replace the needle with a thinner one and continue dropping until the ball stops deforming.
If paired parts are needed, then they need to be made in parallel. We divide the wool into equal parts. Then we simultaneously felt two parts, alternately comparing them with each other.
Simple dry felting from wool: master class
This master class will be dedicated to animals. The techniques shown in several examples will help you understand how easy it is to make any complex figure from simple ones.
Bullfinch

Thin needles enter the finished, dense toy with a creak (but this comes with experience)
Materials for work:
- Felting sponge;
- Fine, medium and thick needles;
- 50 grams of coarse wool;
- Red, black, white wool for lining;
- Clear varnish;
- Plastic;
- Super glue.
The manufacturing technology is as follows. We form a ball from coarse wool and roll it with a needle. Next we form the neck and tail. We add color to the resulting workpiece and place colored wool on the workpiece with a thin needle.
Add more red fur on the belly, head, back and wings. We make the tail separately from the body, put a small strand on a sponge, then perform rectangular felting, leaving small pieces.
We pin the finished tail to the bird with a middle needle. The eyes and beak are made of plastic and glued to the finished bird. Cover the eyes with varnish. The bullfinch is ready, you can decorate the interior with it.
Felting is a very ancient art; products made from felted animal wool appeared a long time ago, several thousand years ago.
Only much later did people figure out how to spin, make yarn, knit, and then they got fabric. We'll do it toy mouse made of wool dry felting method.
Felting (Filz in German felt) or felting, or there is also the term felting - this is the compaction of unspun wool using special needles with notches.
Due to them, felting occurs - tangling of wool fibers and its compaction. There are many other articles on the site with examples of felting toys using the dry method.

Fun not only for children, but also for adults - cute big-eared, mustachioed animals with beady eyes, and even in their own one-room apartment with windows and a door!
Rodents can be easily mastered by beginners; mouse mice can be made very simply and quickly using the dry method with a felting needle. The house is a little more complicated.
Felting wool decorations - toys
First, a few ideas from the World Wide Web - what can be done using the felting or felting method; they can be implemented even by beginners in felting.
You can make just a toy or a decorative figurine, or you can make not only a toy, but also a decoration for your loved one at the same time. Below are some examples of such small animal figurines made of wool that can be used as decorations.
A very cute pendant in the shape of an ermine, a sloth brooch (easy to make even for beginners), and two more tiny brooches in the shape of a tiny owl and a bear cub with a ball. Attracts attention, doesn't it?

For such toys (small size), very little unspun wool is required, especially if you use small old unnecessary balls as a base. Usually people start doing felting by felting balls.
Dry and wet felting of wool - felting
Felting can be dry or wet. Beginners always roll the balls first. I already had my first experience with dry felting - I tried to make several identical balls.

First you need to tear off a small piece from the skein, roll it into a ball in your hand, then roll it with needles on the foam rubber until the ball is sufficiently compacted. Then I tried felting them using the wet felting method in the washing machine. I took unnecessary tights, inserted balls into them one at a time, and then tied a knot. I put the tights with balls in the washing machine along with the regular wash, added washing powder and started.
After felting, the balls turned out smooth, and even so dense that after they dried, it was impossible to pierce them with a needle - the idea was to make winter beads, and now they lie there, waiting in the wings. I saw pictures with beautiful multi-colored felted beads and felted ball earrings. To make earrings, you only need to glue the arms to the balls. By the way, the balls can be either one color or several, two or more colors; they also look very good.
I recently discovered another very interesting way of making felted earrings with my own hands. For a long time I have been eyeing such small (1.5 - 2 cm in diameter) spheres of spirally twisted wire in stores for making jewelry with my own hands. Quite recently, at a sale of summer clothes, I grabbed earrings with such spheres, inside each of them dangled three pieces of vaguely colored small beads. Instead of glass beads, I placed in the spheres (they can be pulled apart briefly and anything can be placed inside) a large, almost the size of the wire ball itself, bright red felt bead. It turned out great! I'll take a photo soon and attach it. I already have an idea to make similar beads to go with the earrings.

You may be interested in another very easy to make sheep figurine. Everything is elementary simple, and the result is very nice. The animal is good for a small gift, a cute souvenir for both an adult and a child in particular. It's warm, cozy and fluffy, a pleasure to hold, and kids can take it to bed with them.
I was very impressed by the photographs of felted mice and decided to try it if I had the chance. And now this case has come. First, I’ll show you what kind of mouse it is - the little one ended up matted on the frame, serious, but with a forelock.

Materials needed for felting wool toys
- Colored unspun wool
- Needles for felting
- Felting sponge (or thick piece of foam)
- Eyes (you can glue plastic ones or felt them with wool of a different color)
- Wire for frame
- Unnecessary small balls of wool (we will save expensive unspun wool)
Needles for dry felting can be purchased separately from the holder. There are holders for several needles at once. This is convenient, there is a large felting area, then the process goes much faster than with one needle.
Foam rubber is needed so as not to prick yourself with sharp needles when felting, because you need to work quickly, otherwise you can accidentally pierce your finger. We will play our toy mouse on it. There are also some special brushes for this, but I didn’t buy them - I used the most ordinary dishwashing sponge, its foam side.
Felting a mouse from wool
As a base for the mouse's head, I used an unwanted small ball of wool from some loose wool product. On top I began to roll white beige wool. The long nose is also a ball, only smaller. Ears - I laid about two circles on a sponge, first on one side, then on the other, alternating this way. Before attaching the ears to the head, I made a small fold in them so that they had a natural shape.
After the head was ready, I started felting the body of the toy. Or rather, I first made the frame of their wire - a “spine”, two arms, two legs and a tail. First, I began to wrap the frame with old unnecessary woolen thread remnants, at first I did not pay attention to their color - black, burgundy, and in the end I found gray-beige and some shaggy white ones.
At first, the wire with threads wound around it looked very suspicious... It strangely resembled a Voodoo doll. As the mouse got fatter, the situation improved, but now the hands of our toy mouse were very reminiscent of Freddy Krueger. :)

Light-colored threads were wound around the wire frame of the arms, legs and tail. Finally, I decided that the mouse was quite plump, and began to felt the unspun wool over the winding of the frame.
When the mouse's body was ready, I used an awl to make a hole in the bottom of the head, poured a little glue there, and stuck a wire there for the head, which stuck out outside the mouse. I added wool to the neck of the toy and connected the head to the body by felting.
I couldn’t find any suitable black beads at home, so I used store-bought plastic eyes for toys. There was only this wool (almost white) and also red (left over from the first experience of felting balls). For the sake of the eyes, I didn’t want to buy a black one for crazy money. After gluing the eyes, I made barely noticeable eyelids on the top and bottom of each eye. Chubchik - that's right, I was playing around, it makes the mouse look funnier.
The mouse is not quite ready yet, not even finished. I’ll probably also change the face - I’ll make a nose and mouth, designate the fingers and toes, and I’ll also knit or sew some doll clothes for her - socks or slippers, a skirt, maybe a sweater with a scarf for the winter. Or maybe I’ll dump some apple into her hands so she has something to eat.

You may be interested in:

For the church holiday - Easter - you can knit such cute products from unspun wool using the dry felting technique.
Bright, colorful, they will perfectly decorate your home along with other traditional decorative elements such as bunnies, hens, chicks, whether embroidered, knitted or sewing.

By adapting felted balls made by dry and wet felting with unspun wool, you can make with your own hands such large interesting earrings as you see in the picture. For details on how to make such original earrings and what you need for this, read the article about felted earrings.

The cats are funny, very cute, they are made in St. Petersburg. There are beads for the eyes, and the holes in them serve as pupils, this gives the animals a comical facial expression. They are mainly made on a frame, there are seated and standing options. The mouth and nose on the muzzles are embroidered with a needle and thread, the fishing line serves as a mustache.
Felted wool warmer toys for beginners
Toys that are actually designed to keep your breakfast testicles warm - a funny little kitchen accessory. You can make it in the shape of some animal, here are examples of a black and white cow with a bell, a pink pig with a bow, and gray sheep.
There are many different types of needlework. One of the most unusual types of craftsmanship that helps create beautiful but also practical things is wool felting. Several techniques have been developed that make it possible to obtain material from it for further work, so those who want to master this type of needlework will need to carefully study them and then choose the best option for themselves.
One of the most unusual types of craftsmanship that helps create beautiful but also practical things is wool felting.
The simplest and most understandable for a person who has not previously been involved in this type of work will be dry felting.. The technique, thanks to its convenience and ease of learning, quickly gained popularity, becoming one of the most popular.
In order to begin the process of turning wool into crafts, toys or decorative elements, you will need:
- Natural wool;
- Needle intended for felting (notched, curved or triangular);
- Patience and perseverance.

The simplest and most understandable for a person who has not previously been involved in this type of work will be dry felting.
It is very important to remember that the process requires maximum attention, rushing is not allowed, therefore children who are under 10-12 years old should not be involved in it. The felting technology is reminiscent of the process of creating a sculptural composition, where the object of the work is wool.
The technique involves separating the unspun sliver from the wool. Then you will need to rub the material between your palms a little to tangle the fibers.
Next steps:
- Roll the workpiece into a cylinder (tight);
- Seal it by inserting a needle;
- Next, you need to carefully rotate the cylinder, achieving uniform fall.
As a result, the workpiece will be compacted and the surface will become smooth. The process can be completed when the deformation of the wool during compaction stops.
Gallery: wool felting (25 photos)


In order to felt wool as efficiently as possible, you need to follow the following recommendations and listen to the advice:
- The relief is created as follows - process a certain area with a needle 5-6 times;
- Before the main work, be sure to rub the wool with your palms - this will speed up and facilitate matting;
- In order to work with large products, you should use trimming padding polyester or sliver (preferably) for the inside.
It is important to remember that you do not need to felt very tightly, as the fibers will begin to tear.
Using this material you can decorate products or hide a flaw that appears on them. This is quite simple to do - you need to roll the required amount of fibers onto the existing base, observing the shape and size. The ideal basis is clothes made of thick fabric and shoes made of felt. This kind of work is called creating an application.
Felting wool for beginners (video)
What crafts can be felted: a variety of options
You can make a variety of crafts with your own hands. These can be things that can decorate the interior, make it special, cozy and homely. You can also learn how to make themed decorations for holidays and important events.
Having learned a certain technique, you should move on to creating more complex crafts - toys. They have to be made with the help of additional elements, such as a base, a pattern; decorations or decorative elements can be added that will help achieve the intended result.

You can make a variety of crafts with your own hands
Also, crafts can become part of decorations for dishes, shoes, furniture - the needlewoman is limited only by her imagination. Any matted elements can be attached (sewn or glued) to the chosen base, which will help to “revive” or complement it.
Felting wool: how to make a toy for the interior
You should start working with wool with simple crafts, but after learning the art of felting, you can move on to more complex and voluminous ones.
Among them, toys and figurines are the most popular, as they can be used both for decoration and for play.

In order to correctly create all the elements, you must first select the main material - wool. Step-by-step instructions for any option suggest that you should start by drawing all the details so that you have a convenient diagram before your eyes.
You should start working with wool with simple crafts, but after learning the art of felting, you can move on to more complex and voluminous ones.
The large parts are made first, then the small ones. The colors and shades of all materials are also selected in advance. In many works, various types of wool are used - hard, soft, and you can always felt an additional part to the finished element if the idea requires it.
In order to carry out the process of connecting all the parts of the future toy, you should leave loose strands of wool in the places where they will be attached. This is necessary to make it easier to felt each element and not to use other materials in the work. The attachment is carried out as follows - the strands of the attached part are applied to the existing base (torso and head), and with quick movements all the existing wool is placed inside the product.
Is it easy to learn felting?
Felting or felting is a process that is easier to learn than it seems.
The work is carried out in several ways - for beginners, the dry option will be optimal, and for those who have a certain skill, the wet option (using ordinary water).

Felting or felting is a process that is easier to learn than it seems
You can start working with dyed or undyed wool - a lot depends on the idea and capabilities of the needlewoman.
How to felt a part onto a finished product: master class
If felting is an interesting activity, then you can expand the range of your own possibilities - learn how to complement the finished product with other elements created using a similar technique. This will require patience and attention. For the first time, it is best to use fabric with a large distance between the threads, for example, burlap. You can also quickly lay it on a base of knitted elements.
Large pieces are often thrown together as a whole. The remaining parts can be connected to each other, leaving free, non-welded threads at the ends of the smaller pieces. With the help of them the base is connected to the woolen element.
Among the diverse world of needlework, wool felting is one of the most unusual and exciting activities. This method will help to refine or update many items of clothing, making it possible to use them again. Bright and exclusive crafts created independently will be an excellent addition to any interior.